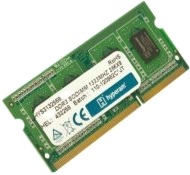
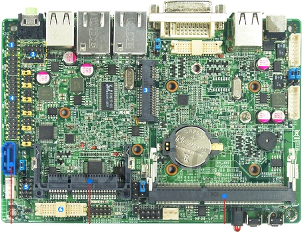
The box is constructed from standard, mature, off-the-shelf parts which in this case are obtained from UK company LinITX.
These parts are ordered online using the links (click images above)
The motherboard (complete with Intel CPU) is pre-installed in a case which comes with a power supply suitable for use in all our data-centres.
The only extra parts required are a "kettle" power lead and network patch leads, which our data-centres have in stock.
Construction:
This is a clip showing Eddie constructing the box from the Jetway, 2GB RAM and 500GB laptop hard disc
BIOS setup:
The device needs to boot up immediately when power is applied (for minimum intervention)
Also network "PXE boot" installation is needs to be set up so the box can be imaged.
This is a clip of Graham setting up the BIOS for deployment.
Image Installation:
The installation process is via network and sets the device up completely so can be deployed immediately.
The whole installation is entirely automated and doesn't even need monitor and keyboard.
Keyboard+Monitor is added here so you can see the process.
This is a clip of the complete installation from blank. NOTE:This video has the 4 minute image download cut out.
The original video was 9 minutes long.
The actual time to do a complete installation from power up to prompt ready is 5.5 minutes.
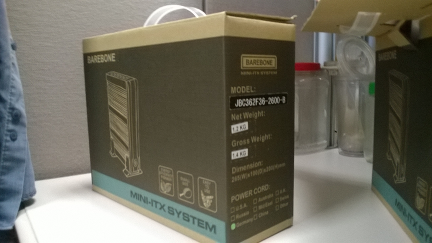
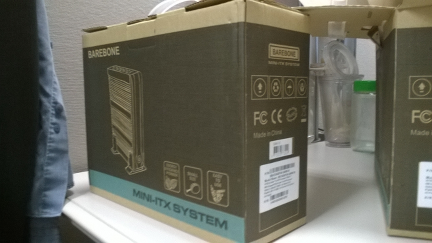
Deploying to location:
For shipping/deployment purposes (each unit):
Value:
£200
Net Weight:
1.2Kg
Gross Weight:
1.4Kg
Dimensions:
265(W) x 100(D) x 200(H) mm
Voltage:
100v - 240v
Power:
60w MAX
"Wazowski. you didn't file your paperwork" - Roz, Monsters Inc
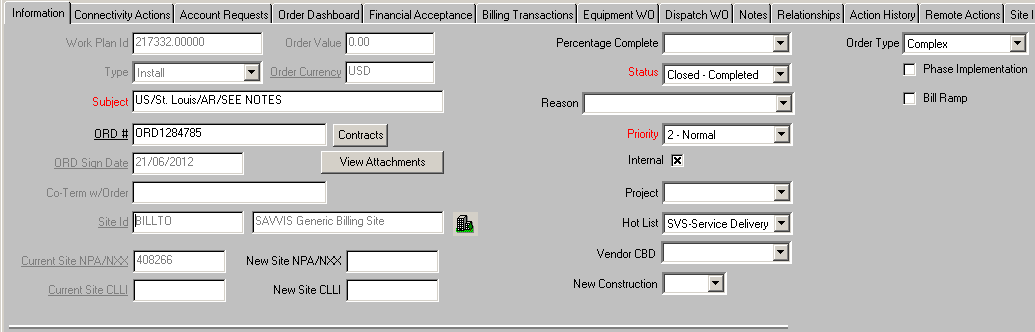
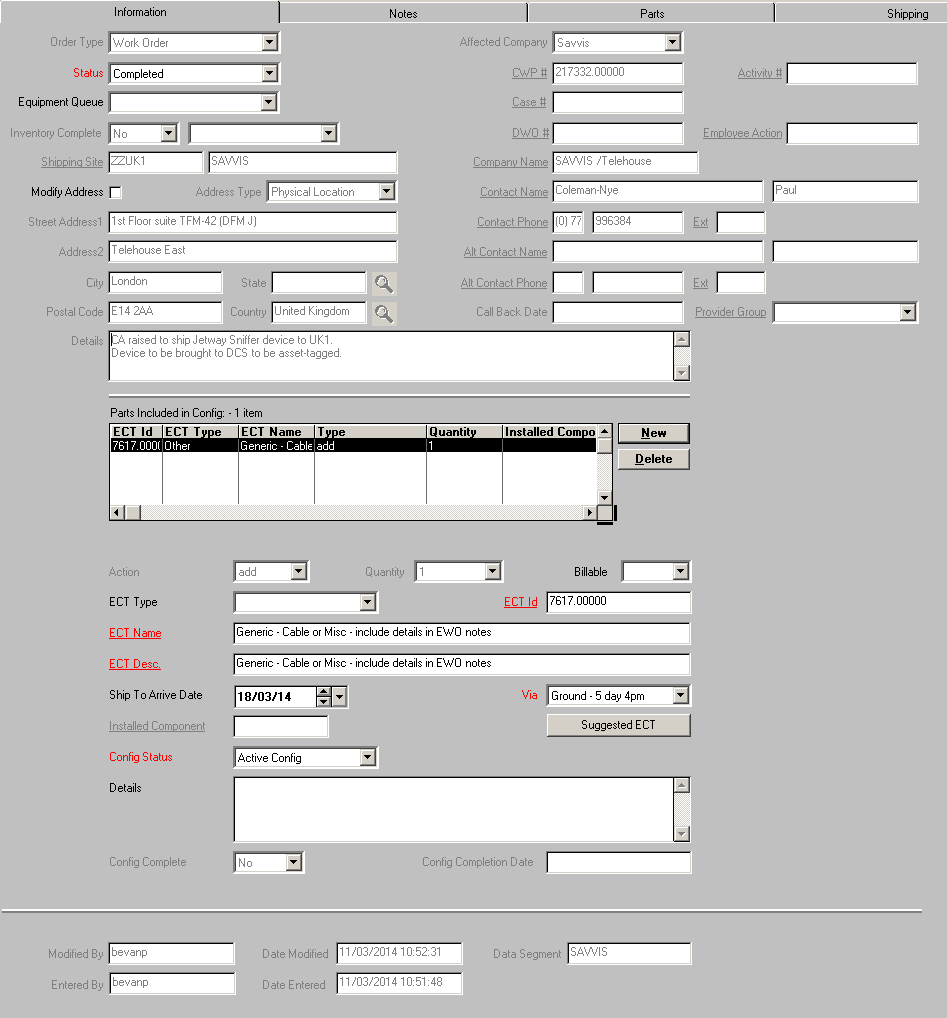
This needs a CWP (Add to CWP 217332 for now):
And an EWO (For now use ECT ID 7617 "Generic - Cable or Misc..."):
...which you need to get GSIO to do.
Please also add this note to the EWO so procurement don't get confused:
Subject: Equipment is shipped from LO6 - no purchase is required
Note: This is part of the project.
Equipment is prepared and dispatched currently by EMEA TSEs
No sourcing or purchasing is required.
Also the devices need to be connected to a management VLAN so needs VLAN allocation (GSIO again) and will need an IP address for the management port.
So request an IP address from IP Admin
Request one /30 range for each so we have 2 addresses:
one for the MGMT on the box and
one is we need to allocated a router address.
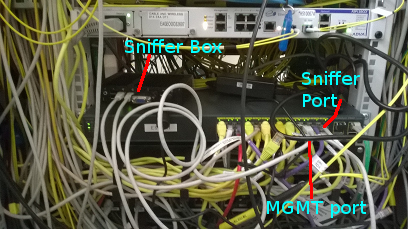
On-Site Set Up
The devices are quite small and light so do not need mounting brackets.
Installation is simply a case of connecting to power and 2 network ports.
DCS (or the clients techs) just need to physically put them in place and wire them up.
No more installation is required.
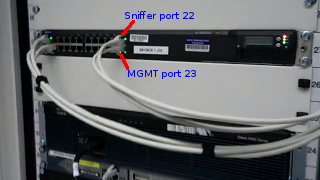
Telehouse UK1
This is a clip of Graham and Eddie installing a device in Telehouse UK1
DB Croydon
This is a clip of Graham installing a device in Deutsch Bank, Croydon (client site)
WARNING: Technical experts only beyond this point.
If you don't know your switches from your routers I'd stop reading now.
Gaining initial access
Cisco
This is an example for accessing via the management port (eth0) connected to gi6/2 (card 6 port 2) on router:
router#show version . . .Cisco CISCO7609-S (M8500) processor (revision 1.0) with 1835008K/131072K bytes of memory.
Processor board ID FOX1205GPGS
router#configure terminal
router(config)#interface gi6/2
router(config-if)#no shutdown
router(config-if)#ip address 192.168.2.2 255.255.255.0
router(config-if)#description SNIFF MGMT Port
router#show ip interface gi6/2
Load for five secs: 3%/0%; one minute: 7%; five minutes: 10%
Time source is NTP, 12:36:58.645 GMT Tue Nov 18 2014
GigabitEthernet6/2 is up, line protocol is up
Internet address is 192.168.2.2/24
Broadcast address is 255.255.255.255
Address determined by setup command
. . .
router#configure terminal
router(config)#ip ssh source-interface gi6/2
router#show running-config | include ssh source-interfaceip ssh source-interface GigabitEthernet6/2
router#ssh -l sniffer 192.168.2.1
Password: sniffer(not shown)Welcome to Ubuntu 14.04 LTS (GNU/Linux 3.2.0-58-generic x86_64)
* Documentation: https://help.ubuntu.com/
Last login: Tue Nov 18 12:24:20 2014 from 192.168.2.2
sniffer@sniffer:~$
Juniper
gnorth@switch> show version
fpc0:
--------------------------------------------------------------------------
Hostname: switch
Model: ex4200-48t
JUNOS Base OS boot [11.3R1.7]
JUNOS Base OS Software Suite [11.3R1.7]
JUNOS Kernel Software Suite [11.3R1.7]
JUNOS Crypto Software Suite [11.3R1.7]
JUNOS Online Documentation [11.3R1.7]
JUNOS Enterprise Software Suite [11.3R1.7]
JUNOS Packet Forwarding Engine Enterprise Software Suite [11.3R1.7]
JUNOS Routing Software Suite [11.3R1.7]
JUNOS Web Management [11.3R1.7]
gnorth@switch> configure
Entering configuration mode
{master:0}[edit]
gnorth@switch# set interfaces ge-0/0/38 description SNIFFER1-MGMT
{master:0}[edit]
gnorth@switch# delete interfaces ge-0/0/38 unit 0 family ethernet-switching
{master:0}[edit]
gnorth@switch# set interfaces ge-0/0/38 unit 0 family inet address 192.168.2.2/24
{master:0}[edit]
gnorth@switch# commitconfiguration check succeeds
commit complete
{master:0}[edit]
gnorth@switch# exit
Exiting configuration mode
{master:0}
gnorth@switch> ssh sniffer@192.168.2.1
The authenticity of host '192.168.2.1 (192.168.2.1)' can't be established.
ECDSA key fingerprint is 17:f8:5c:a6:30:dc:34:87:f4:b8:f1:73:6f:71:58:ea.
Are you sure you want to continue connecting (yes/no)? yes
Warning: Permanently added '192.168.2.1' (ECDSA) to the list of known hosts.
sniffer@192.168.2.1's password: sniffer(not shown)Welcome to Ubuntu 14.04 LTS (GNU/Linux 3.2.0-58-generic x86_64)
* Documentation: https://help.ubuntu.com/
Last login: Mon Nov 10 13:56:21 2014
sniffer@sniffer:~$
switch>show version . . .Cisco CISCO7609-S (M8500) processor (revision 1.0) with 1835008K/131072K bytes of memory.
Processor board ID FOX1205GPGS
switch>show monitorLoad for five secs: 3%/0%; one minute: 7%; five minutes: 7%
Time source is NTP, 12:33:28.683 GMT Thu Jun 11 2015
Session 1
---------
Type : Local Session
Source Ports :
Both : Gi7/9
Destination Ports : Gi5/2
Session 2
---------
Type : Local Session
Source VLANs :
TX Only : 2015
Destination Ports : Gi7/13
switch>
Here in session 1 we have Gi7/9 being mirrored to Gi5/2, and session 2 traffic on VLAN 2015 mirrored to Gi7/13
Juniper
This is an example of setting up an "analyser" on switch where the sniffer is connected to ge-0/0/39
gnorth@switch> show version
fpc0:
--------------------------------------------------------------------------
Hostname: switch
Model: ex4200-48t
JUNOS Base OS boot [11.3R1.7]
JUNOS Base OS Software Suite [11.3R1.7]
JUNOS Kernel Software Suite [11.3R1.7]
JUNOS Crypto Software Suite [11.3R1.7]
JUNOS Online Documentation [11.3R1.7]
JUNOS Enterprise Software Suite [11.3R1.7]
JUNOS Packet Forwarding Engine Enterprise Software Suite [11.3R1.7]
JUNOS Routing Software Suite [11.3R1.7]
JUNOS Web Management [11.3R1.7]
{master:0}
gnorth@switch> configure
Entering configuration mode
{master:0}[edit]
gnorth@switch# delete interfaces ge-0/0/39 unit 0 family inet
{master:0}[edit]
gnorth@switch# set interfaces ge-0/0/39 unit 0 family ethernet-switching
{master:0}[edit]
gnorth@switch# commitconfiguration check succeeds
commit complete
{master:0}[edit]
gnorth@switch# edit ethernet-switching-options analyzer SNIFFER2
{master:0}[edit ethernet-switching-options analyzer SNIFFER2]
gnorth@switch# set input ingress vlan 2003
{master:0}[edit ethernet-switching-options analyzer SNIFFER2]
gnorth@switch# set output interface ge-0/0/39
{master:0}[edit ethernet-switching-options analyzer SNIFFER2]
gnorth@switch# commitconfiguration check succeeds
commit complete
gnorth@switch# exit
{master:0}[edit]
gnorth@switch# exit
Exiting configuration mode
{master:0}
gnorth@switch>
An alternative is to simply add the sniff port to the VLAN:
gnorth@switch> configure
Entering configuration mode
{master:0}[edit]
gnorth@switch# set interfaces ge-0/0/39 unit 0 family ethernet-switching vlan members TARGETVLAN
{master:0}[edit]
gnorth@switch# commitconfiguration check succeeds
commit complete
{master:0}[edit]
gnorth@switch# exit
Exiting configuration mode
{master:0}
gnorth@switch>
If you are doing this it's a good idea to remove the IP address from the sniff port:
gnorth@switch> ssh sniffer@192.168.2.1
sniffer@192.168.2.1's password:
Welcome to Ubuntu 14.04 LTS (GNU/Linux 3.2.0-58-generic x86_64)
* Documentation: https://help.ubuntu.com/
Last login: Thu Nov 20 11:37:45 2014 from 192.168.2.2
sniffer@sniffer:~$ sudo -i
[sudo] password for sniffer: sniffer(not shown)
root@sniffer:~# ifconfig eth1
eth1 Link encap:Ethernet HWaddr 00:30:18:c2:8e:7b
inet addr:192.168.1.1 Bcast:0.0.0.0 Mask:255.255.255.0
inet6 addr: fe80::230:18ff:fec2:8e7b/64 Scope:Link
UP BROADCAST RUNNING MULTICAST MTU:1500 Metric:1
RX packets:438493 errors:0 dropped:0 overruns:0 frame:0
TX packets:6 errors:0 dropped:0 overruns:0 carrier:0
collisions:0 txqueuelen:1000
RX bytes:43266202 (43.2 MB) TX bytes:468 (468.0 B)
Interrupt:45 Base address:0x2000
root@sniffer:~# route -n
Kernel IP routing table
Destination Gateway Genmask Flags Metric Ref Use Iface
192.168.1.0 0.0.0.0 255.255.255.0 U 0 0 0 eth1
192.168.2.0 0.0.0.0 255.255.255.0 U 0 0 0 eth0
root@sniffer:~# ifconfig eth1 0.0.0.0
root@sniffer:~# ifconfig eth1
eth1 Link encap:Ethernet HWaddr 00:30:18:c2:8e:7b
inet6 addr: fe80::230:18ff:fec2:8e7b/64 Scope:Link
UP BROADCAST RUNNING MULTICAST MTU:1500 Metric:1
RX packets:599111 errors:0 dropped:0 overruns:0 frame:0
TX packets:6 errors:0 dropped:0 overruns:0 carrier:0
collisions:0 txqueuelen:1000
RX bytes:59565140 (59.5 MB) TX bytes:468 (468.0 B)
Interrupt:45 Base address:0x2000
root@sniffer:~# route -n
Kernel IP routing table
Destination Gateway Genmask Flags Metric Ref Use Iface
192.168.2.0 0.0.0.0 255.255.255.0 U 0 0 0 eth0
root@sniffer:~#
...and accessing the sniffer to confirm packets are captured on sniff port eth1.
In this case we are looking for traffic sent to multicast address 233.74.125.41.
router#ssh -l sniffer 192.168.2.1
Password: sniffer(not shown)
Welcome to Ubuntu 14.04 LTS (GNU/Linux 3.2.0-58-generic x86_64)
* Documentation: https://help.ubuntu.com/
Last login: Tue Nov 18 18:44:08 2014 from 192.168.2.2
sniffer@sniffer:~$ sudo -i
[sudo] password for sniffer: sniffer(not shown)
root@sniffer:~# cd /data01/
root@sniffer:/data01# ls -lh |tail
-rw------- 1 root root 6.9M Nov 19 03:23 eth1_00034_20141119022317.pcap
-rw------- 1 root root 6.9M Nov 19 04:23 eth1_00035_20141119032317.pcap
-rw------- 1 root root 6.9M Nov 19 05:23 eth1_00036_20141119042317.pcap
-rw------- 1 root root 11M Nov 19 06:23 eth1_00037_20141119052317.pcap
-rw------- 1 root root 9.4M Nov 19 07:23 eth1_00038_20141119062317.pcap
-rw------- 1 root root 138M Nov 19 08:23 eth1_00039_20141119072317.pcap
-rw------- 1 root root 218M Nov 19 09:23 eth1_00040_20141119082317.pcap
-rw------- 1 root root 183M Nov 19 10:23 eth1_00041_20141119092317.pcap
-rw------- 1 root root 126M Nov 19 11:23 eth1_00042_20141119102317.pcap
-rw------- 1 root root 54M Nov 19 11:50 eth1_00043_20141119112317.pcap
root@sniffer:/data01# tshark -nr eth1_00043_20141119112317.pcap |headtshark: Lua: Error during loading:
[string "/usr/share/wireshark/init.lua"]:46: dofile has been disabled due to running Wireshark as superuser. See http://wiki.wireshark.org/CaptureSetup/CapturePrivileges for help in running Wireshark as an unprivileged user.
Running as user "root" and group "root". This could be dangerous.
1 0.000000000 194.132.163.65 -> 233.74.125.41 UDP 96 Source port: 36829 Destination port: 31041
2 0.058631000 194.132.163.65 -> 233.74.125.41 UDP 102 Source port: 36829 Destination port: 31041
3 0.058657000 194.132.163.65 -> 233.74.125.41 UDP 70 Source port: 36829 Destination port: 31041
4 0.065297000 194.132.163.65 -> 233.74.125.41 UDP 76 Source port: 36829 Destination port: 31041
5 0.090308000 194.132.163.65 -> 233.74.125.41 UDP 114 Source port: 36829 Destination port: 31041
6 0.136390000 194.132.163.65 -> 233.74.125.41 UDP 102 Source port: 36829 Destination port: 31041
7 0.144950000 194.132.163.65 -> 233.74.125.41 UDP 114 Source port: 36829 Destination port: 31041
8 0.144982000 194.132.163.65 -> 233.74.125.41 UDP 79 Source port: 36829 Destination port: 31041
9 0.144992000 194.132.163.65 -> 233.74.125.41 UDP 70 Source port: 36829 Destination port: 31041
10 0.145001000 194.132.163.65 -> 233.74.125.41 UDP 120 Source port: 36829 Destination port: 31041